
oAuth over CLI
oAuth over CLI
If you use server-to-server authentication follow below guide for oAuth over CLI
Getting started
Just as with the regular oAuth route, first you will need to setup a developer account and create an app.
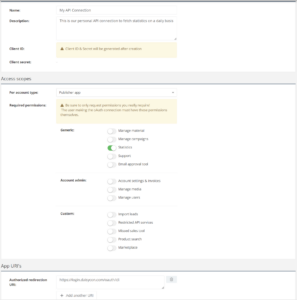
During the creation of your app make sure you only request the permissions the app needs! If an app only needs to fetch statistics, don’t ask for permissions to modify connected users or account information. Also note that the user that will connect the app will need to have these permissions.
When setting up oAuth via CLI we recommend using our CLI Authorized Redirect URL. So during creation of the app you can register this as your Authorized redirect URI instead.
CLI Authorized Redirect URL:
https://login.daisycon.com/oauth/cli
After configuring the app it would look somewhat like this:
oAuth flow: out-of-the-box
After setting up your developer account and app correctly, it’s time to start with the oAuth over CLI flow.
Daisycon provides two out-of-the-box solutions for this:
We have PHP script available in our oAuth examples repository
And we have an npm package available for Typescript/Node/Javascript users
In both repositories, the readme.MD file will tell you how to execute this script. Below we proceed with how to use the PHP version.
Simply run the script with the desired arguments (use –help to see what’s possible) we recommend providing the following arguments:
- clientId
- clientSecret
- outputFile
By default our script uses the Daisycon CLI endpoint as a redirect URI, you can always provide your own.
php PHP/cli-client.php --clientId="YOUR_CLIENT_ID" --clientSecret="YOUR_CLIENT_SECRET" --outputFile="daisycon-api-tokens.json"
After executing the command, the script will ask you to open the URL in your browser, proceed with the CLI login and paste the response code back in. It should look something like this:
Copy paste this URL in your browser and proceed with logging in to your account and selecting the desired account for the oAuth connection. After that you should end up on our CLI endpoint with the response code, which should look somewhat like this
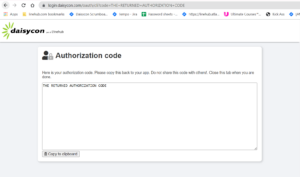
Copy the code to clipboard and paste it back in the terminal. It should then exchange it for an access token and a refresh token, if you added an output file it will store it in that file, otherwise it will put it back on screen.
You can then use these tokens to automate your API calls and refresh the tokens when they expired. As long as you refresh at least once every 30 days and you do not revoke the tokens. User interaction is no longer required.
oAuth flow: manual
If you cannot use the PHP or Typescript/Node/Javascript version, you can write your own solution. You can look at the code base of our examples to see what happens.
In general, just follow the regular oAuth flow in our Authentication documentation with the following changes.
- Instead of redirecting the user to our login domain, output the URL that would’ve been redirected to and ask the user to enter it the browser manually instead.
- Instead of using a call back to a public http host that handles the code use our oAuth for CLI endpoint to show the code on screen
- Ask the user to paste the code back into your CLI to process it and convert it to an access token